My first web page
On this page, we will cover how to write your first web page:
- Firstly we will briefly cover the fundamentals of how web pages work.
- Then we will go through the basic instruction set.
- Finally we will write a web page that can be displayed in any web browser.
This page on writing HTML is unusual in that it's absolutely the very
first web page written by the author (Dan Faulke). You may just be tempted to
view the simple source code of this page (Click View|Page Source in your browser).
1. Fundamentals of web pages
Web pages are simply text with a few added instructions for special 'mark up'.
They are written a lot like documents from word processors in the 1980's,
where there was no graphical interface. All the type looked
exactly the same on the screen - and the user had to insert special characters
to tell the word processor to use special fonts or formatting.
The special characters were later hidden, and effects displayed when the
document was printed,or in this case, displayed in the web browser.
In a similar way, web pages are simply 'text' files with special
'tags' that tell the web browser to do clever
things, particularly linking between pages, so that with a simple click you can
move to another page (or part of a page).
Similar tags can be used to make that text look pretty, but nowadays a lot of
the 'prettying up' is done using complex things called Cascading Style Sheets (CSS).
This includes colours, fonts, formatting such as justifying,
and specifying the typeface of headings.
Pictures and borders can also be added. Plain web pages - ones that do not
interact with the server - are generally .html files. This suffix
stands for hypertext markup language and is the
simplest language to write web pages, but there are many other ways of generating
such pages. Another common way of generating pages is using PHP scripts.
The web browser you're using contains software that tells it how to interpret the tags that
the web page author has added. When you click on a link to a page,
the simple file is downloaded to your computer, and your
browser starts reading the file.
HTML is a very forgiving 'language', and the
browser reading a web page will often do its
best to interpret badly-written HTML, or in the worst case,
simply ignore everything it doesn't understand. (Not so with a more recent standard,
XML, which simply must be 100% correct)!
2. The basic instruction set
The first instruction the browser must read is a tag that says
which "language' the page is written in. Essentially,
this tells the browser what each of the other tags means.
The most basic set of tags to use is html:
<html> at
the start of your text file will tell the browser to start recognising
anything between < and > symbols as an
html tag or special instruction and to not display it on a screen.
Like many tags, it is paired with a closing tag,
in this case </html>, to tell the browser that the
html tags are finished, and in general </html> will
be the last line in the web page. Instructions that have a
start and an end are almost always paired in this
fashion, i.e. <TAG> is stopped by </TAG>.
Simply adding a / to your previous tag will turn off the
special formatting.
So the basic outline of a web page is as follows:
<!DOCTYPE HTML PUBLIC "-//W3C//DTD HTML 4.01 Transitional//EN"
  "http://www.w3.org/TR/html4/loose.dtd">
<html>
 ... stuff goes here ...
</html>
Don't worry too much about the very first line with the !DOCTYPE tag and all of the following
gibberish! It is a 'requirement' of that austere body, the W3C, that every HTML page begins
in this way, and is often ignored, but it's technically correct to do so. Most browsers will
get along fine with a simple <html> however! (You can only imagine the increase in
bandwidth if all
172 000 000 current websites
with their approximately 46 billion web pages were to adhere to this rule).
The rest of the web page is divided into a head and a body. For simplicity's sake, the head section tells the
browser (among other things) what to put in the title bar at the top of the page. For instance, this web page has the title
'An introduction to writing web pages'. The '- Mozilla Firefox' or, (shock horror), something else,
is written in by the browser. So when adding a title, we first need to turn on the head section. Unsurprisingly
this tag is <head>. We then add the tag for the title, <title>, followed by the title text. Then turn off
the title with </title> and finally turn off the head section with </head> --- Our
document is starting to take shape...
<!DOCTYPE HTML PUBLIC "-//W3C//DTD HTML 4.01 Transitional//EN"
  "http://www.w3.org/TR/html4/loose.dtd">
<html>
<head>
 <title>An introduction to writing web pages</title>
</head>
<body>
 ... more stuff goes here ...
 </body>
</html>
Finally we get to start on the page itself! <body> switches on the body section. The author then can type to
their heart's content. However, without headings and paragraphs the web page would be very difficult
to read.
Headings come in different sizes. They are labelled <h1> through to <h6>. For example, the largest heading is
turned on by <h1>
and then turned off by
</h1>. You can see how ugly <h1>
is --- use it sparingly, perhaps only for the main heading of a web page, if this.
The browser simply reads off text as a continuous
paragraph, and therefore the author must insert either <br />
to start a new line
or insert <p>
for a new paragraph.
2.1 Hyperlinks
The most important additions to most web pages are hyperlinks. Without them navigating the internet would become
the world wide dot collection! Adding hyperlinks is very easy.
External links to other files are added by
using <A> and </A> tags. For example:
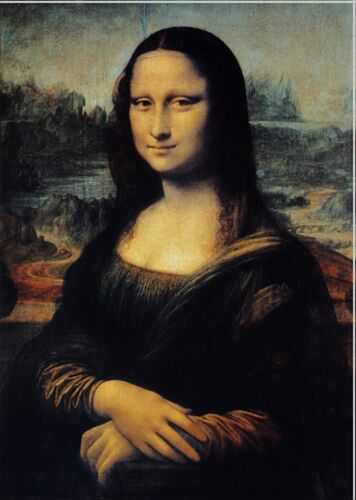
<A href='Mona_Lisa.jpg>Mona Lisa</A>
looks like this:
Mona Lisa. If you click on the link, the current page
will be replaced by an image of the Mona Lisa (push the back button on your browser to return)!
The href ='filename.ext' part labels the file to go to,
and the text (or even an image!) between <A href...> and </A> becomes highlighted as the
displayed hyperlink text. Clicking the link will open up a new page, in this case the
jpeg file specified.
Linking to other web pages
Much more worthwhile than linking to images is linking to other web-pages.
Even if you want to link to an image, it's far smarter to embed the image in a page. Can you
see why? Yep, the obvious answer is that if someone has successfully navigated to your image
on the world-wide web, you probably want them to be able to link back from the image
to your magnificent page! Try this link! (The sharp-eyed reader
will notice that the dimensions of the picture on the linked page are different. Look
at the source code to see how we managed this alteration).
It's very important to distinguish between relative links, like the one above
to the monalisa.htm page in the same directory:
<a href="monalisa.htm">this link</a>
... and absolute links to pages on the world wide web. Here's an absolute
reference to the same page:
<a href="http://www.anaesthetist.com/mnm/html/monalisa.htm">this link</a>
It's often a good idea to make a clear distinction between local links on your site,
and links to external sites. (See how, for example,
WikiPedia does this, but that's another
story)!
Internal links within a document
The other important hyperlinks are internal links.
These use the same hyperlink system, but require predefined
anchors. For example, to create an anchor at the top of the document, we said:
<A name="top"></A>
You may wish to try the following links (you can use the back button of your browser
to return here):
Each of these hyperlinks has an anchor within the page.
A note on naming
As this is my first page, I initially started out naming images and links any which
way. What does it matter? Why shouldn't I call an image "Mona Lisa", or for that matter
"mona lisa"? It turns out that (unlike Microsoft products) most web pages are CasE SENsitive.
If you forget this, you'll run into trouble. For example, if you store an image on your
web server in the images directory as "monalisa.jpg" and then refer to it in a web page as:
<img src="images/MonaLisa.jpg" alt="stock pic of Mona Lisa"
  width="300" height="421">
... then the image simply won't be found. You may also encounter problems if you
include spaces in your names. Be careful, play around a bit, and get a feel for what works.
Some web page authors ultimately resort to using lower case exclusively, and replacing
spaces with dashes.
Another common error is to refer to a page using the wrong suffix. For example, if
your page is called index.html then a reference to index.htm will fail.
Neatness counts
Another 'newbie' temptation is to simply plonk all web content in a single directory.
A moment's consideration will reveal why this is not a good idea. When you come
back to edit things after six months of adding things, you may have hundreds of items
flopping around loosely within that directory. Early on, try to give your pages structure.
Put all of the images in an images sub-directory, and later on, when you get fancy,
put sounds in a sounds sub-directory, and so on. Structure complex projects in
a logical (and well-documented) way, so that you can find your way around!
2.2 Frills
All of this may seem a little monotonous. Tools do exist for making the page a bit
more interesting. For example we can add
- tables with or without borders
- bulleted lists using <ul> to start the list, </ul> to end the list ('unordered lists') with each item
labelled <li>
- 'ordered' (numbered) lists using
- <ol> to start;
- then <li> for each item; and
- </ol> to end
- images for example Mona_Lisa (<img src='filename.ext' >)
|

|
The new user is also often tempted to fiddle with font colours, sizes and faces. Avoid
this temptation (The W3C gets very ratty about using <font> tags, and for once, they're
right. Rather learn how to use CSS).
3. How to write your first web page
Putting all the above into practice is very easy. Let's create a page using the
simple (and mildly irritating) Windows tool Notepad. (You might be tempted to try doing
this in MS Word --- big mistake, as Word will mutilate plain HTML, and if you "save as
HTML" in Word, it adds a lot of crud).
3.1 Using Notepad
Open Notepad.
It can be found under Start - Programs - Accessories. Type in the bare bones of your
file, for example:
<!DOCTYPE HTML PUBLIC "-//W3C//DTD HTML 4.01 Transitional//EN"
  "http://www.w3.org/TR/html4/loose.dtd">
<html>
<head>
 <title>An introduction to writing web pages</title>
</head>
<body>
 ... more stuff goes here ...
 </body>
</html>
(You can copy the above example, and simply paste it into Notepad. Highlight the
text with your mouse, press control+C and then in Notepad press control+V to paste).
Before you go further, save this simple file. Let's say you wish to call the file
intro.html. In Notepad, click 'Save As', and click on the option next to 'Save as type'
to select All Files. Type in the file name (intro.html) and save the file
where you want to keep it. Initially, you might just save to the Desktop, but later on
you'll want to create your own little directory for HTML, structuring it intelligently
as we described above!
Then open the file with your browser. If you saved your first file on the desktop,
simply go to the desktop and double-click on it. It should open automatically, of course
as a blank page at this stage.
Using Notepad again, you can start filling in text for your webpage. You should do the
following at the beginning:
- Within the body section insert your text;
- Play around with paragraphs, and different sized headings. Try to structure
your document so that e.g. <h2> is appropriately below <h1> and so forth,
with no big jumps from say <h2> to <h4> !
- Test out both ordered and unordered lists;
- Lastly, try basic effects such as italic
with <i> and </i> and bold with <b> and </b> (Use
bold sparingly).
Remember to add <p> between paragraphs!! Notepad files are saved without any formatting information. The web browser
just reads character by character without recognising new paragraphs. You can't use more advanced word processors as they
have additional information saved with the file, which the web browser would try and read.
3.2 Cranking things up a notch
Every time you want to review what you have written in notepad, you must first Save the file.
Then you must click Refresh in your browser, to update the changes.
In practice this becomes a little frustrating! This is why specific
HTML-writing utilities are available for people regularly writing web pages.
Explore the options using Google.
You will also want to supplement the meagre information we've provided with a good
HTML reference. There are several on the web. But don't get bogged down in the minutiae ---
rather start creating pages, and learn as you go!
Dan Faulke
June 2008
|

|